Add items to an inventory
Adding items one at a time
- Click Personal property in your Tasks menu.
- Click Replace.
- Click Add item.
- Enter the replacement item details.
- Click Add.
Add inventory items using media already added to the project
- Click Files in your General Collaboration menu.
- Click on the image of the item you want to add to the inventory.
- Click Edit image
 .
. - Switch Add to personal property to on.
- Enter a description of the item.
- Enter the item information.
- Click Save.
Option 3: Bulk add inventory items
- Click Personal property in your Tasks menu.
- Click the vertical ellipsis
 below your name.
 - Select Import inventory.
- Click Download import template.
- Enter inventory items and requested information.
- Save the completed for to your computer.
- Return to the Import Inventory drawer.
- Upload the completed inventory template using the Drop files here or click to browse field.
 .
. - Click Import.
Add inventory items from outside of the portal
- Click the link in the notification.
- Read and accept the Important Information.
- Click Add replacement item.
- Enter the item information.
- Click Add.
- After all inventory items have been added, click Submit.
Quick inventory
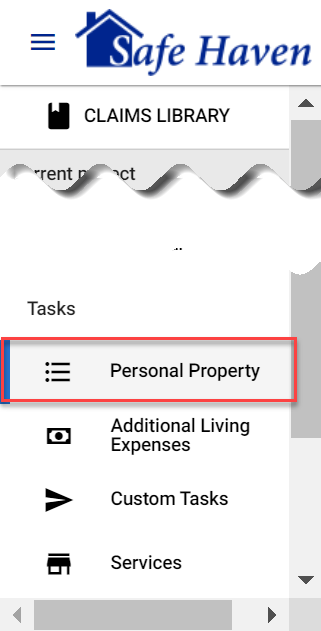
- Select Personal Property from your left-side navigation menu.
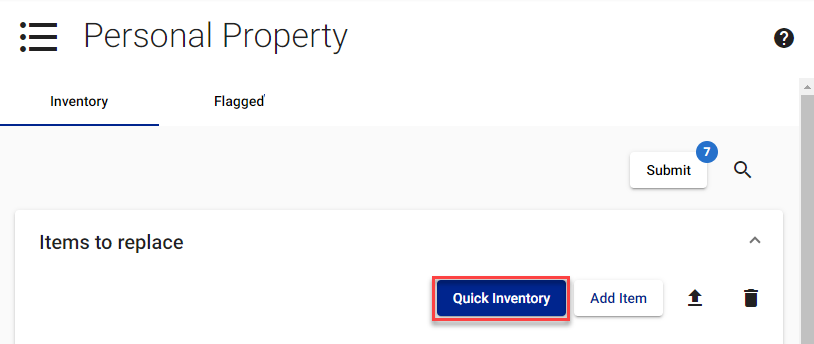
- Select the Quick Inventory button at the top of the Items to replace card.
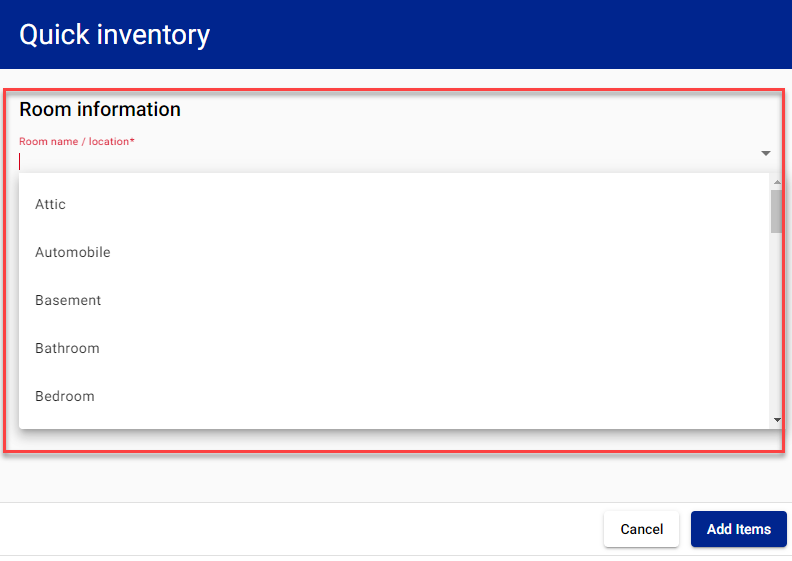
- Enter the room name or location or click the down-pointing arrow to open the dropdown menu of room names and locations.
- Open the list of commonly identified rooms by clicking the down-pointing arrow.
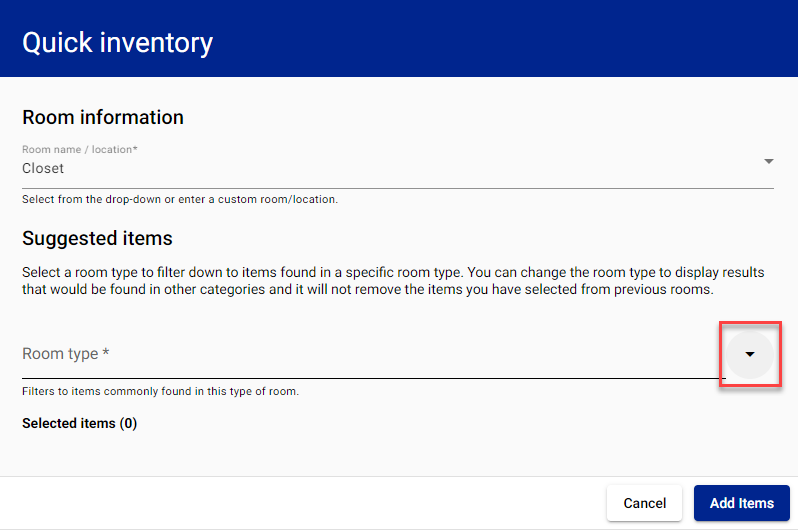
- Select the checkbox for the type of room you want to filter by.
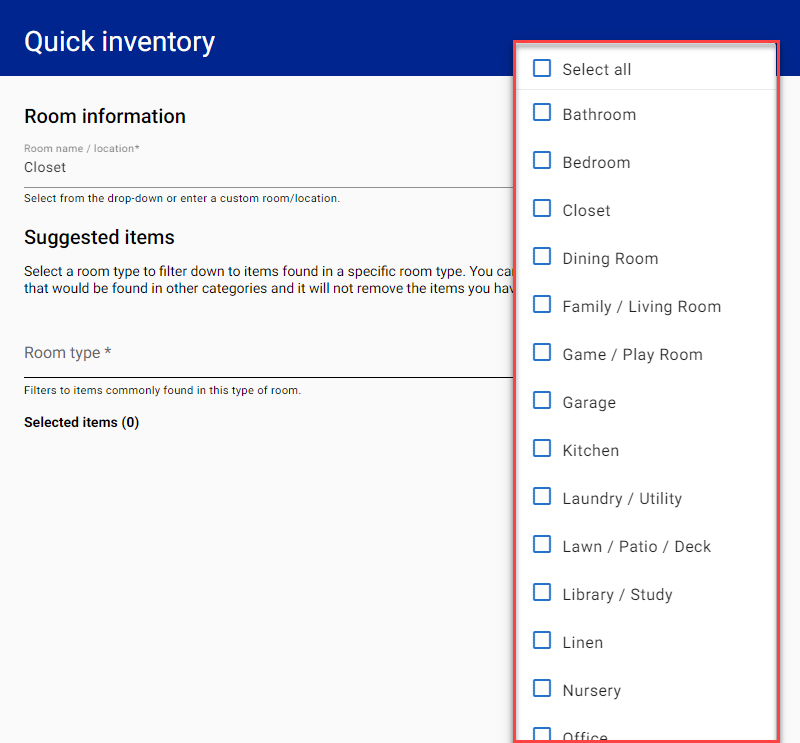
- Exit the menu by clicking outside of the list.
- Either enter a keyword in the search items field and select the Search magnifying glass icon
 or scroll through the items listed.
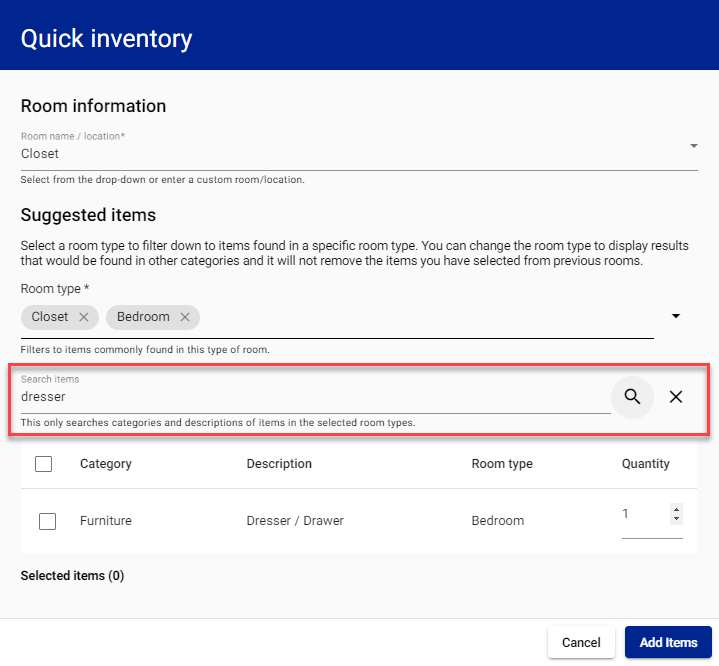
- Change the quantity if you need to add more than one of that item to your inventory.
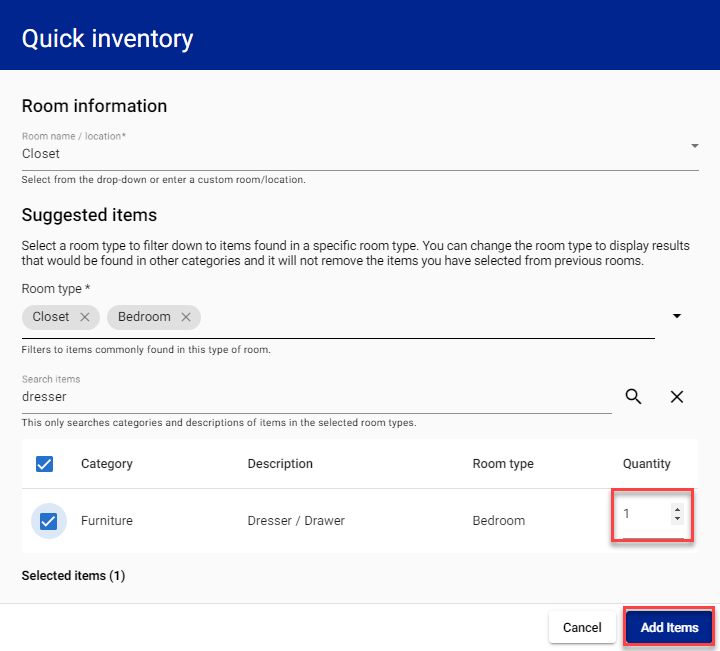
- Select Add item at the bottom of the Quick inventory drawer. This closes the drawer and adds the items to the Items to replace card.
- Select the Edit pencil icon
 on the line of the item you need to add information to.
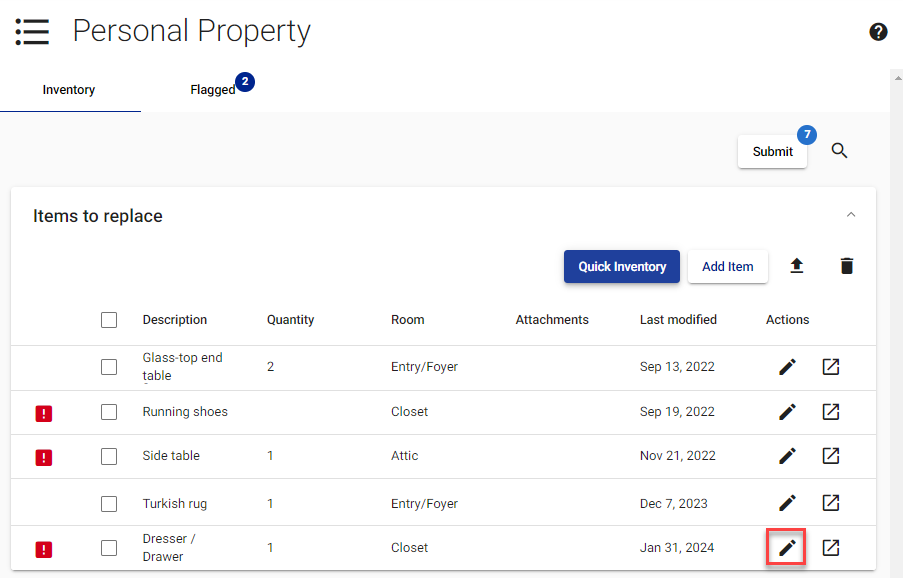
- In the Edit item drawer, add or edit information in the fields marked with an asterisk (*).
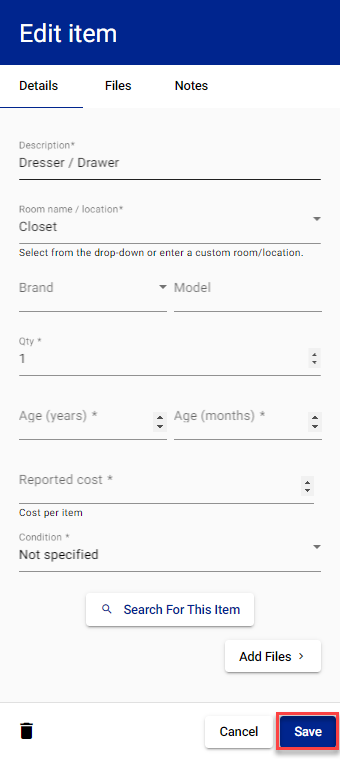
- Select Save.