Primary contact: Resources and team members
 Updated
by
Jennifer B.
Updated
by
Jennifer B.
Project resources
Resources are companies or individuals who have been invited to participate in a project. Resources become team members when they accept the invitation.
Team members
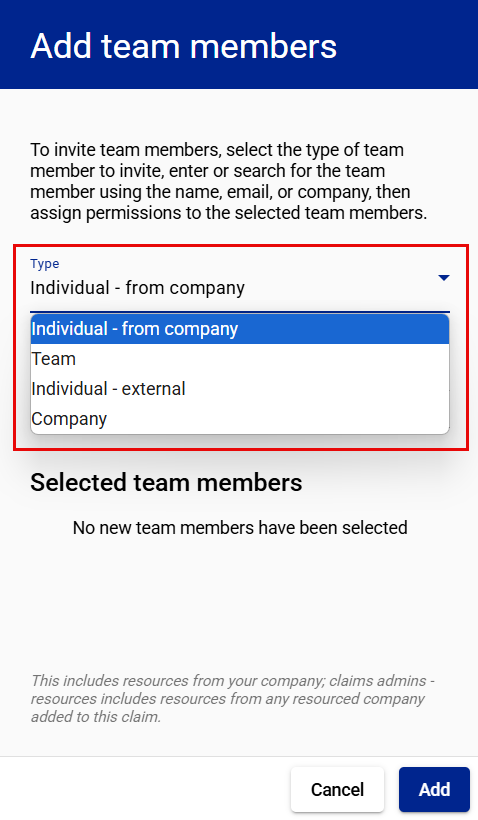
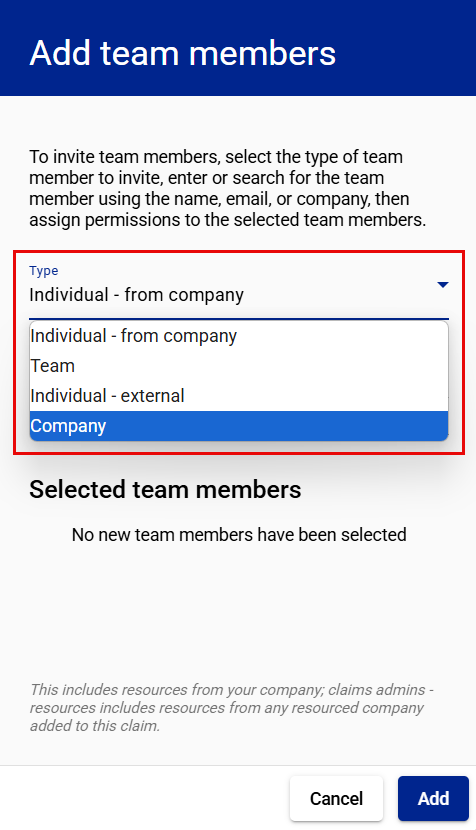
There are four types of team members you can add to a project:
- Individual-from company. This is an individual already identified as a resource by a company’s instance administrator.
- Team. This is a group of individuals, set up by an instance administrator, that can be treated as a single team member. For example, a team can be assigned as a claim's primary contact, allowing each member of the team to perform the duties of a primary contact.
- Company. This is a third-party resource, set up by your company, who will assign their own team members to collaborate with the policyholder. These resources must be set up ahead of time by your company’s administrator and have a company resource ID.
- Individual-external. This is a professional outside of your organization who has not been set up as a resource within your organization or as company resources.
Team members receive a notification letting them know they’ve been added to your claim if they are available in the dropdown list in the Add team members drawer.
Add and remove team members
Add an individual – from company
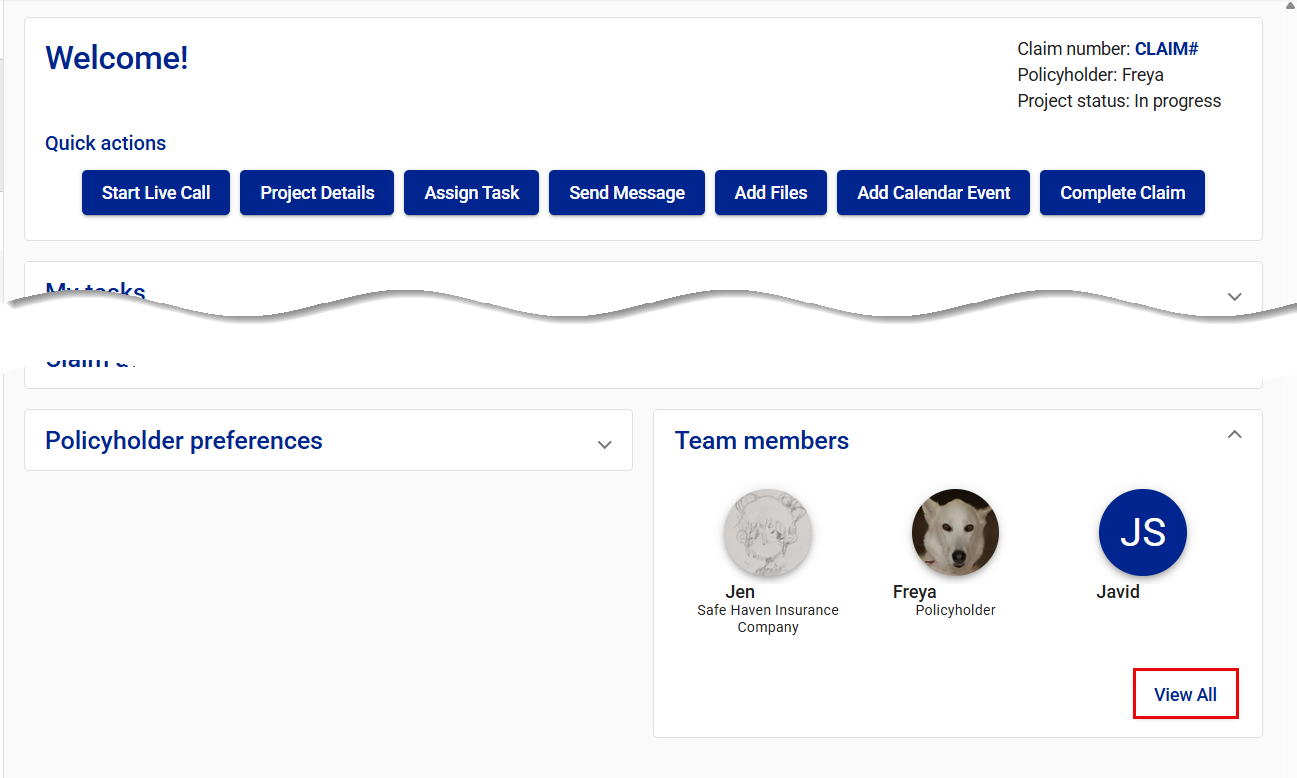
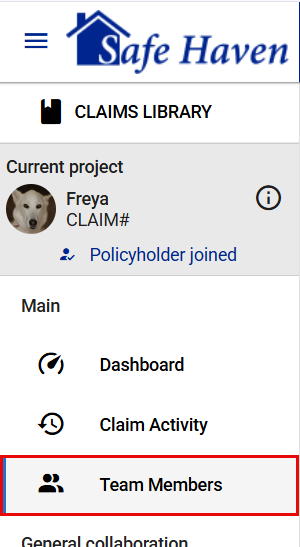
- Select Team members from your side navigation menu

or View All in the Team members card on your dashboard.
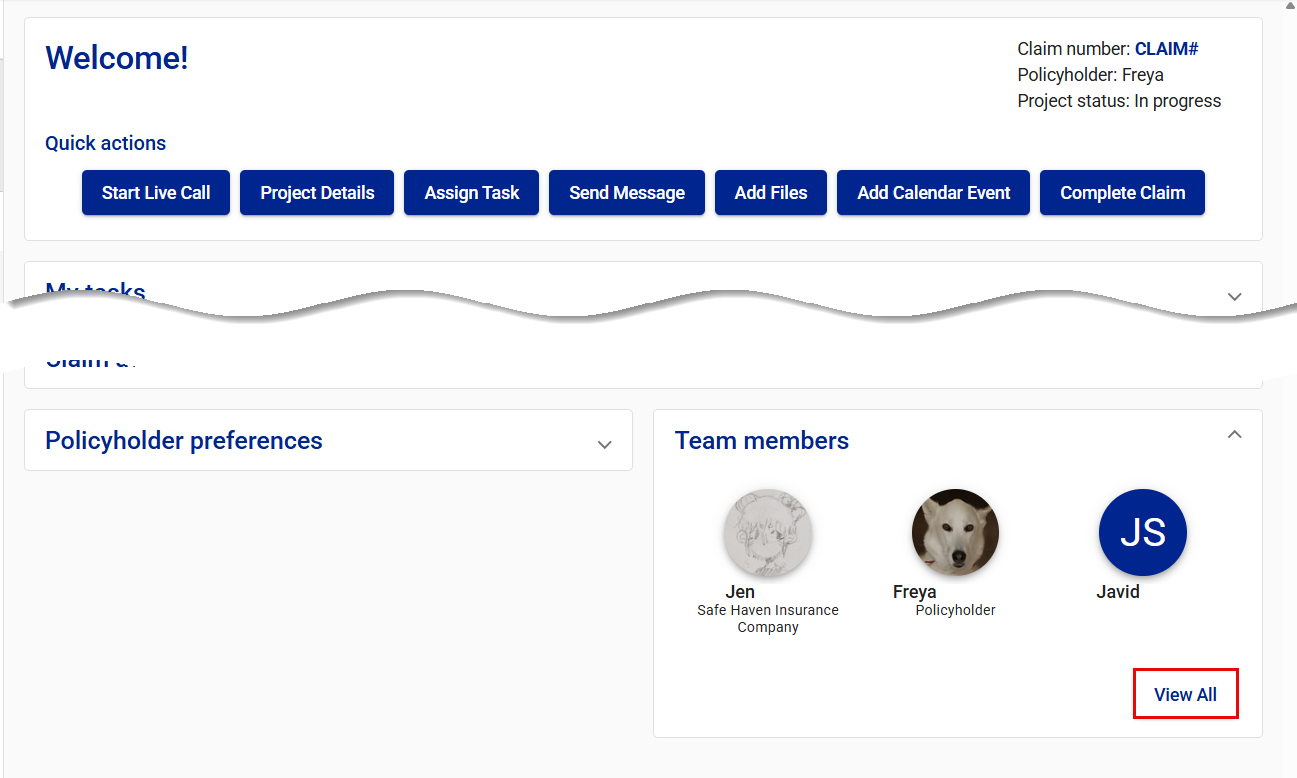
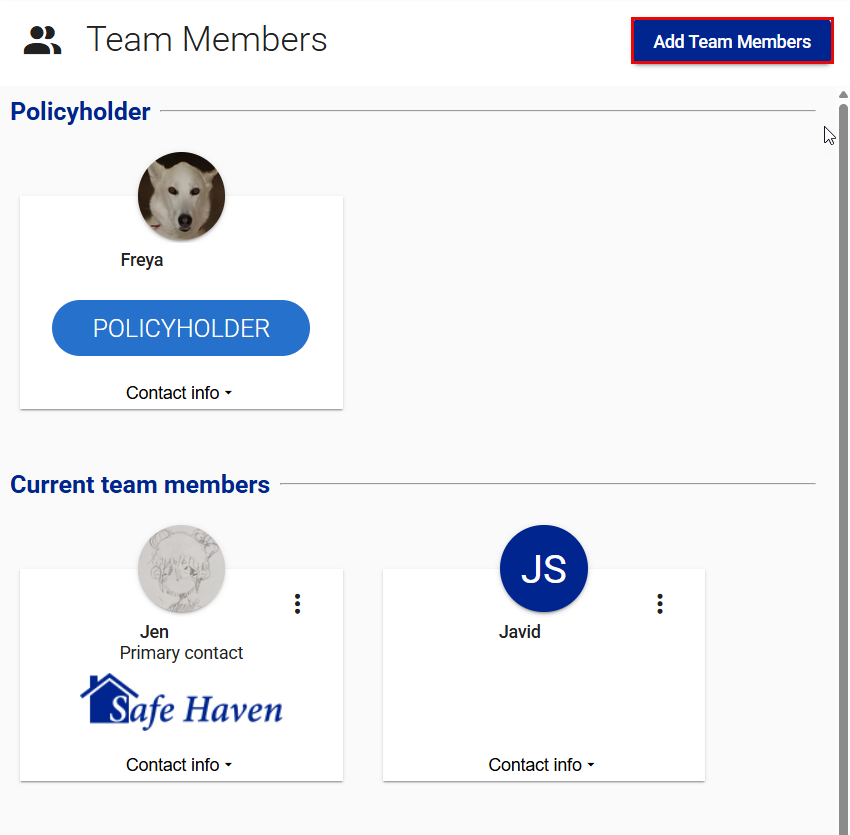
This takes you to the Team Members page.
- Select Add Team Members. This opens the Add team members drawer.
- Select Individual-from company from the Type dropdown menu.
- Type the name or email of the individual resource in the Search by name or email field. Auto-fill options will start to appear as you type.
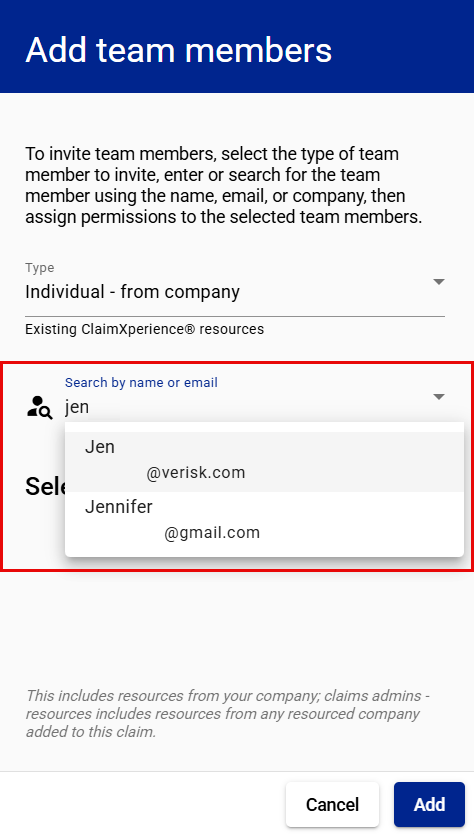
- Select the team member from the list of names that appears.
- If you want the user you are adding hidden from the policyholder’s view, select the Hide from policyholder checkbox. This can be done or undone at any time during the life of the claim.
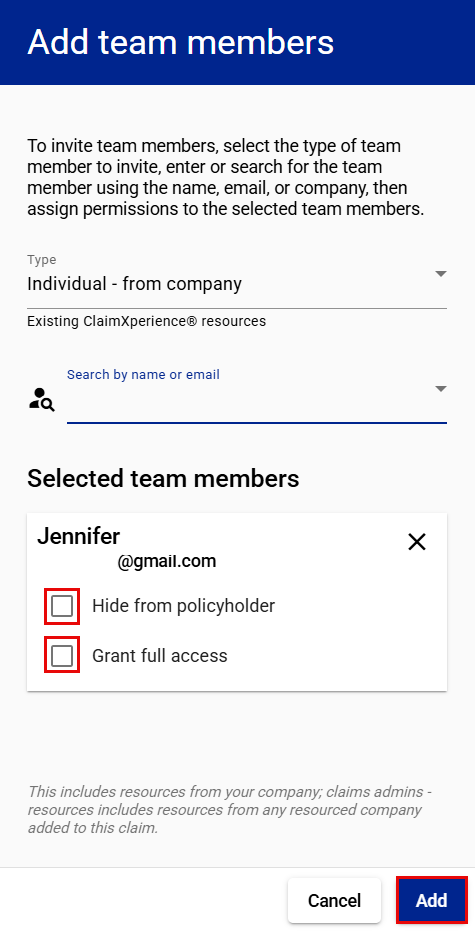
- If you want the user you are adding to have full access to the claim without being assigned as primary contact, select the Grant full access checkbox. This can be granted or revoked at any time during the life of the claim.
- Select Add.
Add a team
- Select Team Members from your side navigation menu

or View All in the Team members card on your dashboard.

This takes you to the Team Members page.
- Select Add Team Members. This opens the Add team members drawer.

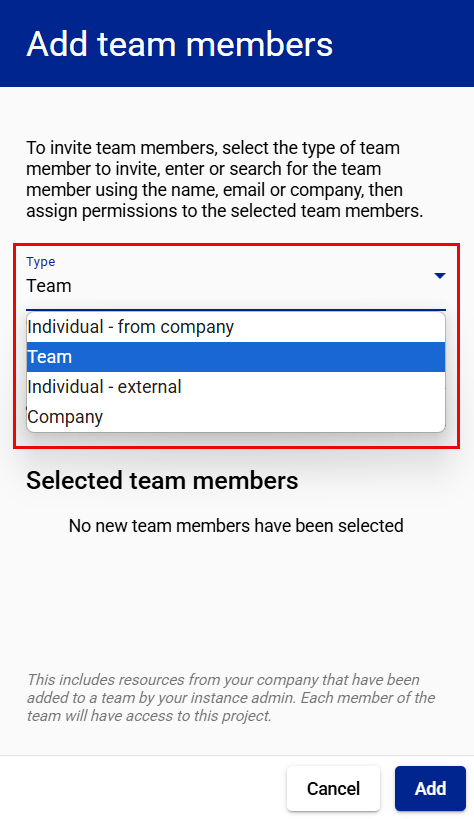
- Select Team from the Type dropdown menu.
- Type the name or email of the team resource in the Search by team name field. Auto-fill options appear as you type.
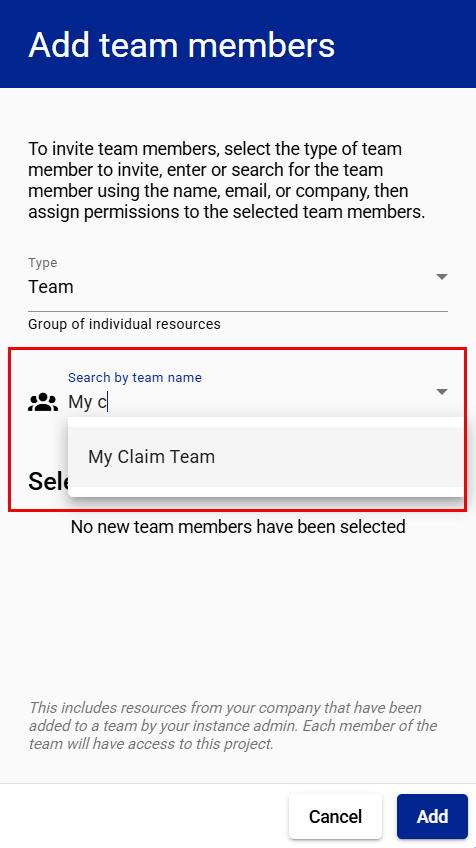
- Select the team from the list that appears.
- If you want the team you are adding to be hidden from the policyholder’s view, select the Hide from policyholder checkbox. This can be done or undone at any time during the life of the claim.
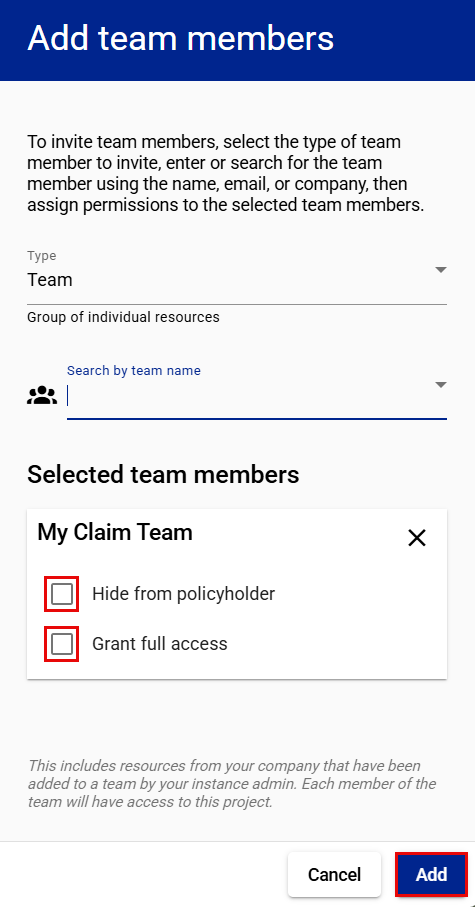
- If you want the team you are adding to have full access to the claim without being assigned as primary contact, select the Grant full access checkbox. This can be granted or revoked at any time during the life of the claim.
- Select Add.
Add a company
- Select Team Members from your side navigation menu

or View All in the Team members card on your dashboard.
This takes you to the Team Members page.
- Select Add Team Members. This opens the Add team members drawer.

- Select Company from the Type dropdown menu.
- Open the Select company dropdown menu.

- Select the company from the list of companies that appears.
- If you want the company you are adding to be hidden from the policyholder’s view, select the Hide from policyholder checkbox. This can be done or undone at any time during the life of the claim.
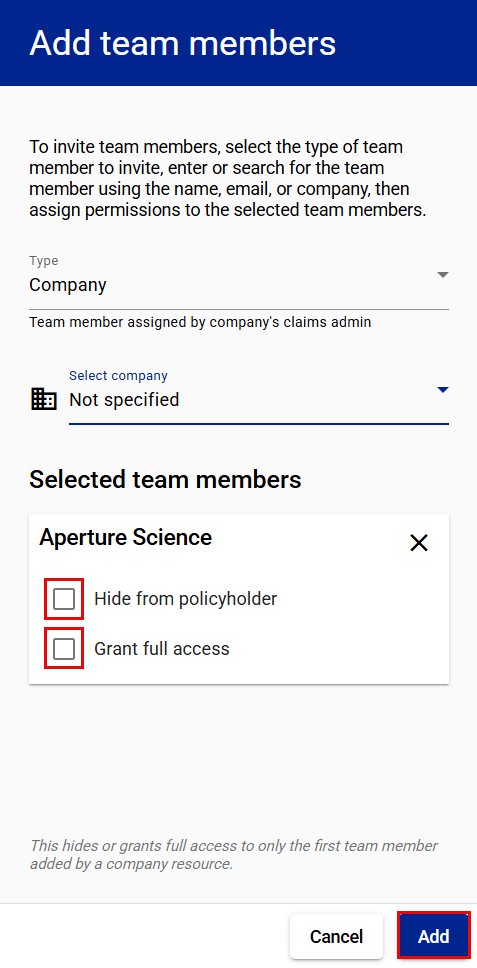
- If you want the company you are adding to have full access to the claim without being assigned as primary contact, select the Grant full access checkbox. This can be granted or revoked at any time during the life of the claim.
- Select Add.
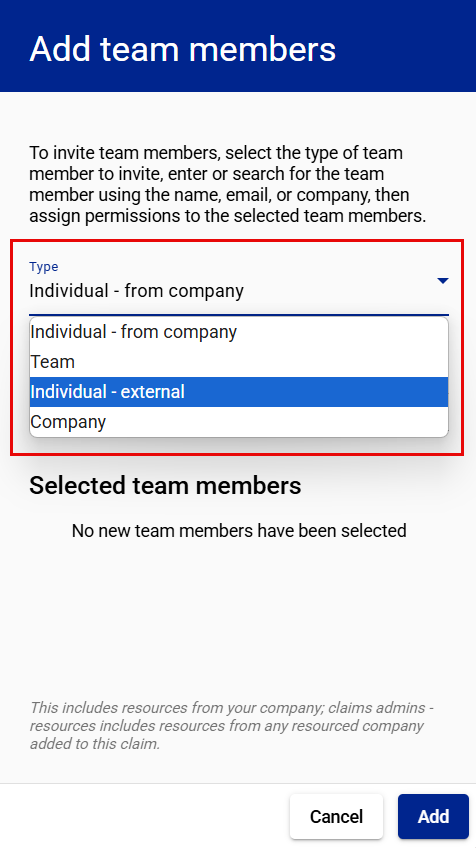
Add an individual - external
- Select Team members from your side navigation menu.

or View All in the Team members card on your dashboard.

This takes you to the Team Members page.
- Select Add Team Members. This opens the Add team members drawer.

- Select Individual-external from the Type dropdown menu.
- Enter the individual’s email address on the Email address line.
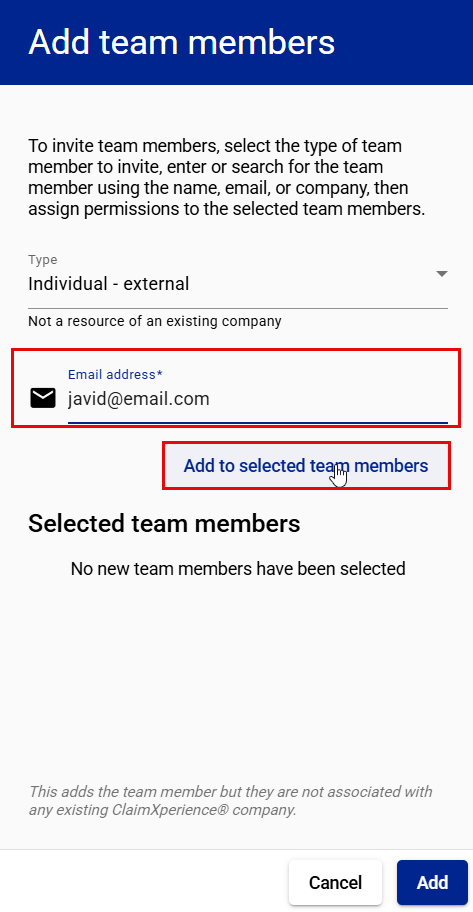
- Select Add to selected team members.
- If you want the user you are adding hidden from the policyholder’s view, select the Hide from policyholder checkbox. This can be done or undone at any time during the life of the claim.
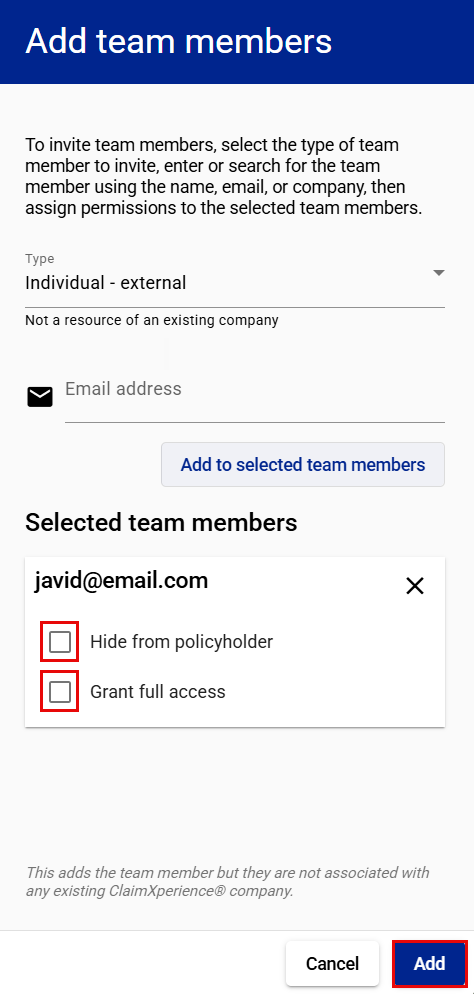
- If you want the user you are adding to have full access to the claim without being assigned as primary contact, select the Grant full access checkbox. This can be granted or revoked at any time during the life of the claim.
- Select Add.
Team members who are not resourced by your company but have been invited to participate in this one-time collaboration receive an email inviting them to create an account. They will show up in the Pending invites section of the Team Members page until they create an account and accept the invitation to join the project.
Remove a team member from a project
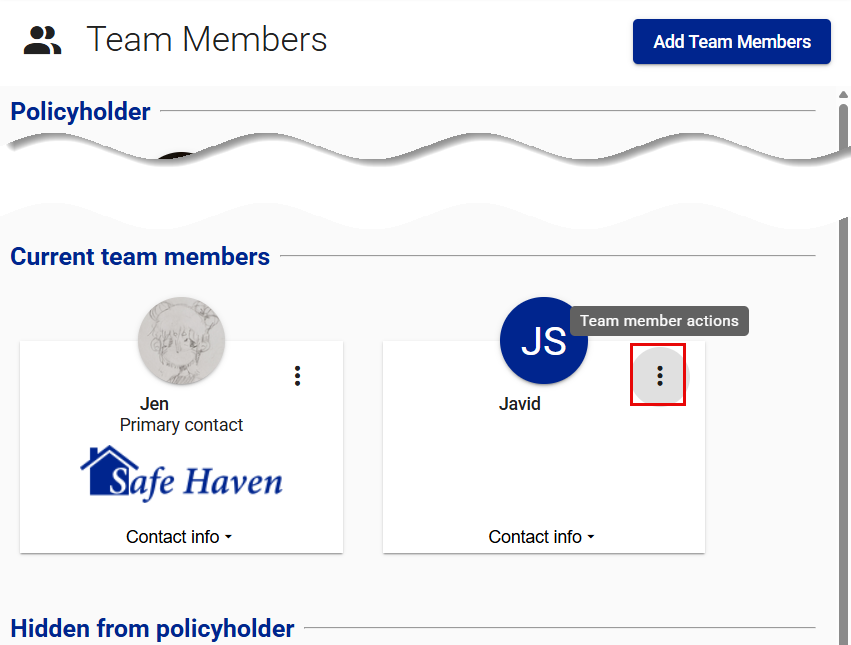
- Select Team Members from your side navigation menu
or View All in the Team members card on your dashboard.

This takes you to the Team Members page.
- Select the Team member actions icon on the card of the team member you want to hide. This opens a dropdown menu.
- Select Remove team member.
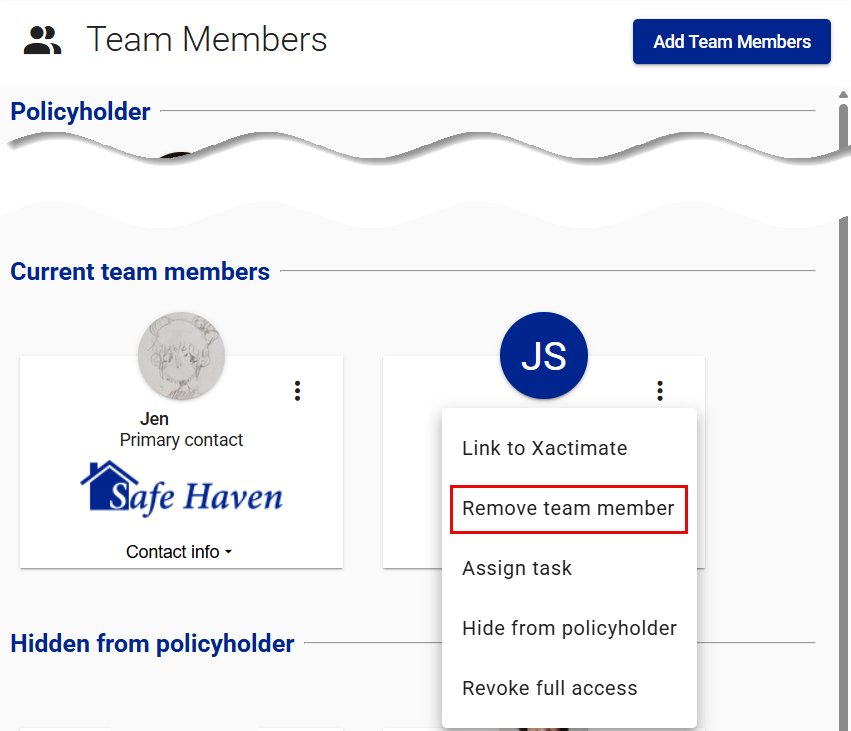
- Select Remove in the Remove team member confirmation dialog.

Hide or unhide team members
You can hide or unhide team members when they are invited to a project or at any time during the claim process. You can see which team members are visible or hidden by clicking on the Team Members tab in your side navigation menu and noting who is under the Hidden from Policyholder section.
Team members who are not hidden can share messages, videos, images, and documents with other team members.
Hidden team members cannot share messages, videos, images, or documents with the policyholder. They also cannot add events to the shared calendar but can view them.
Hide current team members
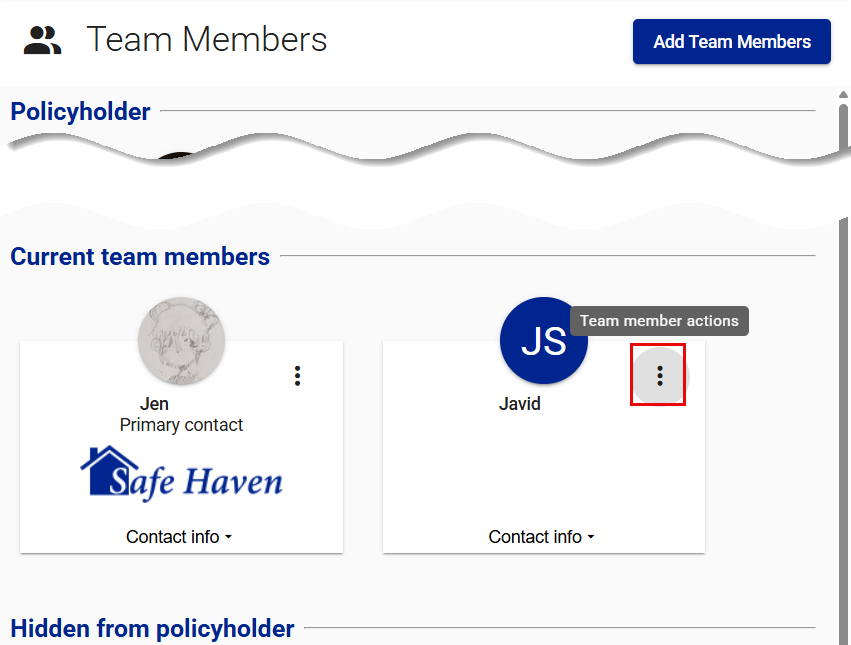
- Select Team Members from your side navigation menu

or View All in the Team members card on your dashboard.

This takes you to the Team Members page.
- Select the Team member actions icon on the card of the team member you want to hide. This opens a dropdown menu.
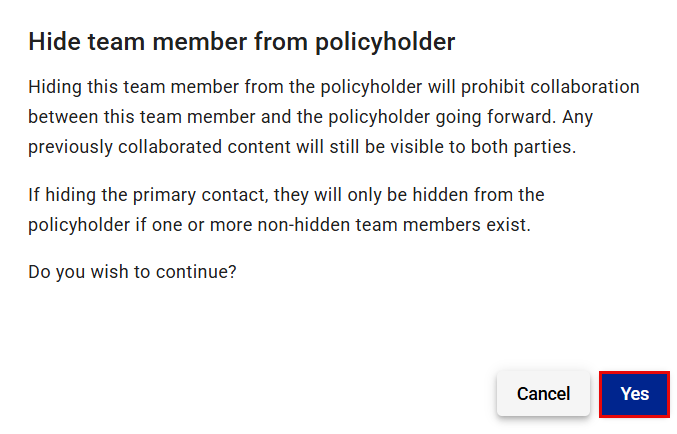
- Select Hide from policyholder.
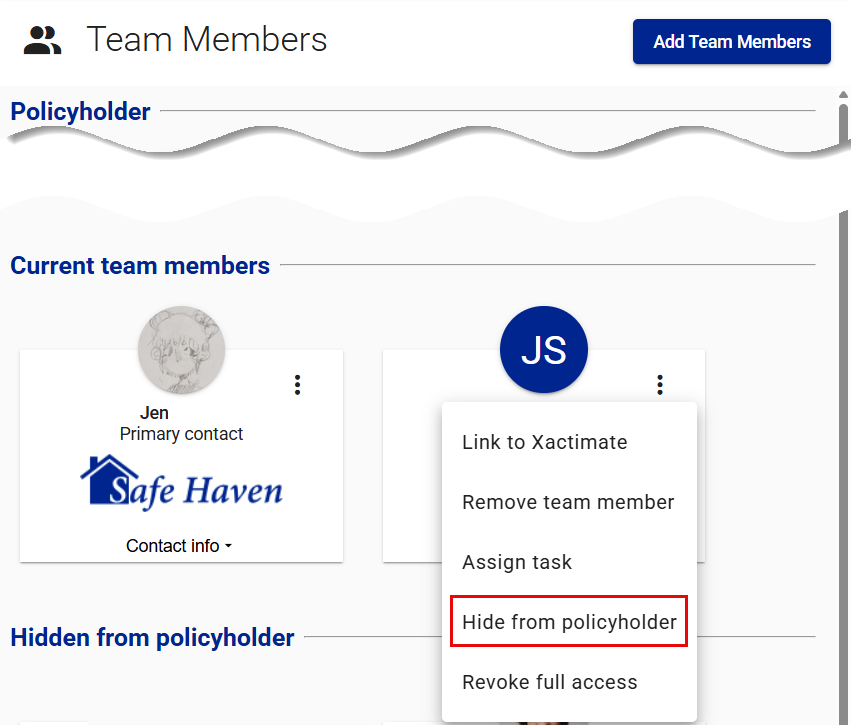
- Select Yes in the Hide team member from policyholder confirmation dialog. This moves the team member’s card from the Current team members section to the Hidden from policyholder section.
Make hidden team members visible
- Select Team Members from your side navigation menu

or View All in the Team members card on your dashboard.

This takes you to the Team Members page.
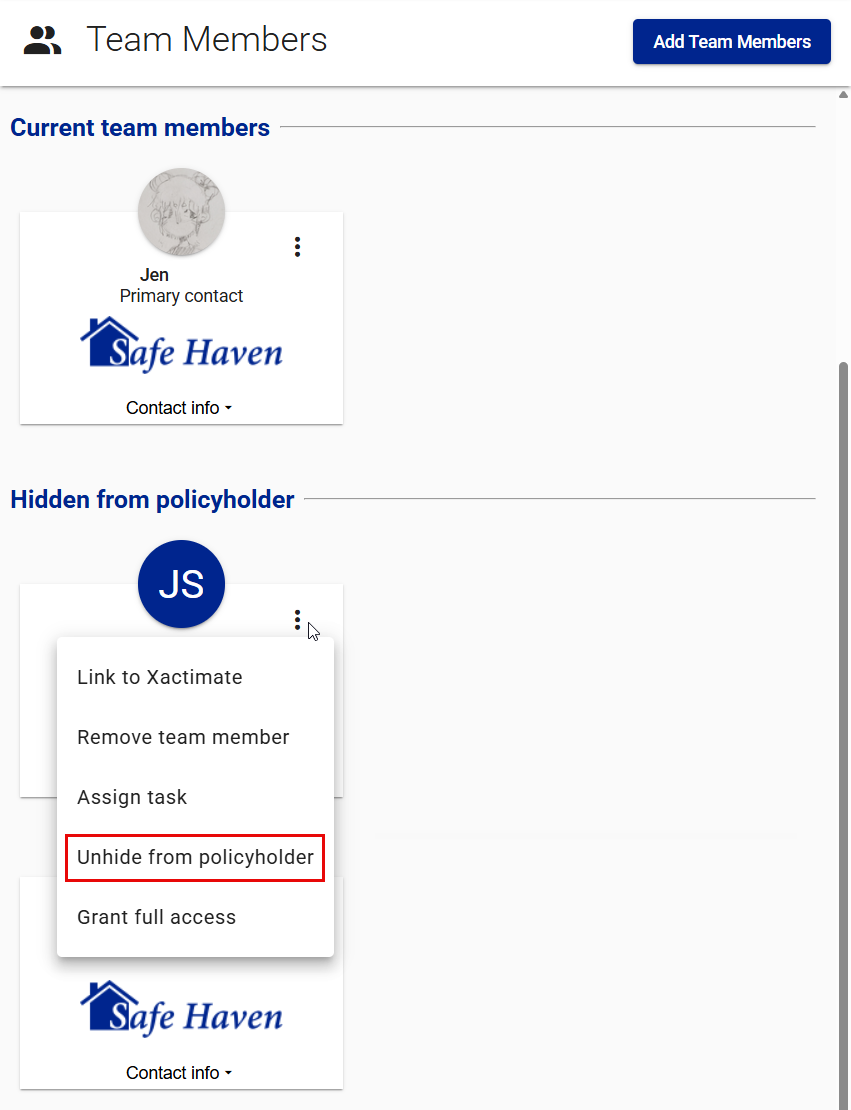
- Select the Team member actions icon on the card of the team member you want to hide. This opens a dropdown menu.

- Select Unhide from policyholder.
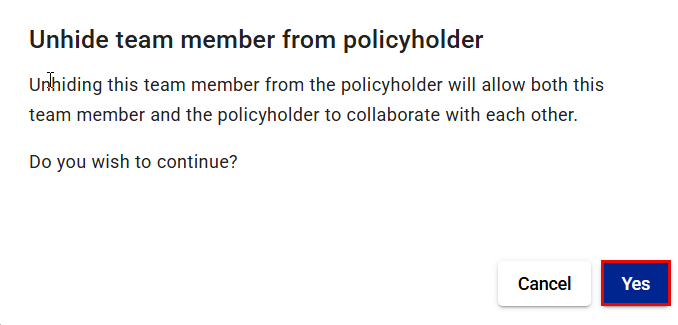
- Select Yes in the Unhide team member from policyholder confirmation dialog.
Grant or revoke full access
Granting a team member full access to a project gives them the same rights or access as a primary contact without making that team member the primary contact. You can grant or revoke a team member's full access at any time throughout the life of the claim.
Grant a current team member full access
- Select Team Members from your side navigation menu

or View All in the Team members card on your dashboard.

This takes you to the Team Members page.
- Select the Team member actions icon on the card of the team member you want to give full access. This opens a dropdown menu.

- Select Grant full access.

Revoke someone's full rights to a project
- Select Team Members from your side navigation menu

or View All in the Team members card on your dashboard.

This takes you to the Team Members page.
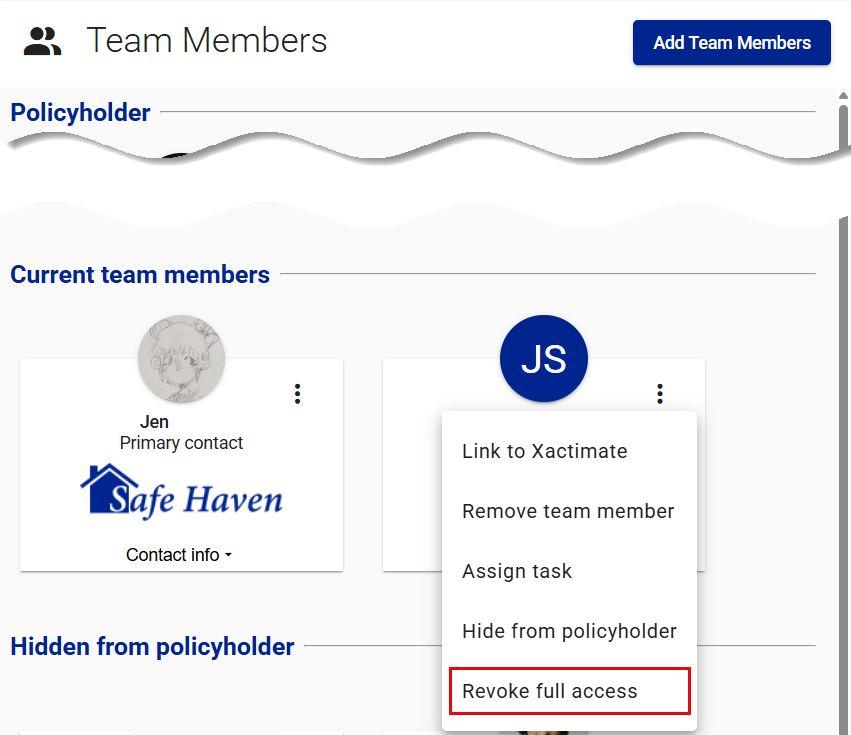
- Select the Team member actions icon on the card of the team member whose full access you want to revoke. This opens a dropdown menu.

- Select Revoke full access.